Dynamic Nested Forms with Rails and Stimulus
I’ve been away from Ruby on Rails for a couple of years. And in that time, Rails introduced Hotwire, and Stimulus. In this post, I extend my Rails nested from tutorial by adding a button to dynamically add new nested form elements using a Stimulus Nested Form component.
We’re going all in on Rails, so I’ll be using the default importmap JS package manager.
Set up
Let’s first install the Stimulus nested form component
bin/importmap pin @stimulus-components/rails-nested-formUpdate app/javascript/controllers/application.js to register the stimulus component.
import { Application } from "@hotwired/stimulus" // Should exist already
import RailsNestedForm from '@stimulus-components/rails-nested-form'

const application = Application.start() // Should exist already
application.register('nested-form', RailsNestedForm)
...
Let’s modify our previous form by moving our nested fields into a partial. First create the partial app/views/training_sessions/_training_step_fields.html.erb and add the following code:
# app/views/training_sessions/_training_step_fields.html.erb
<%= f.label :description %>
<%= f.text_field :description %>
After we create our partial, we can modify the form in new.html.erb:
# app/views/training_sessions/new.html.erb
<%= form_with model: @training_session do |form| %>
  Session Steps:

  <%= form.fields_for :training_steps do |training_steps_form| %>
    <%= render partial: "training_step_fields", locals: { f: training_steps_form } %>
  <% end %>

  <%= form.submit "Create New Session" %>
<% end %>
At this point, when we go to training_sessions/new we should see the same behaviour as before.
Implementing Stimulus Nested Form Component
Let’s implement the Stimulus component. Modify your new.html.erb to add a Stimulus target:
<%= form_with model: @training_session do |form| %>
  Session Steps:
  <template data-nested-form-target="template">
    <%= form.fields_for :training_steps, TrainingStep.new, child_index: 'NEW_RECORD' do |training_steps_form| %>
      <%= render partial: "training_step_fields", locals: { f: training_steps_form }%>
    <% end %>
  </template>


  <%= form.fields_for :training_steps do |training_steps_form| %>
    <%= render partial: "training_step_fields", locals: { f: training_steps_form } %>
  <% end %>

  <div data-nested-form-target="target"></div>

  <button type="button" data-action="nested-form#add">Add Training Step</button>

  <%= form.submit "Create New Session" %>
<% end %>
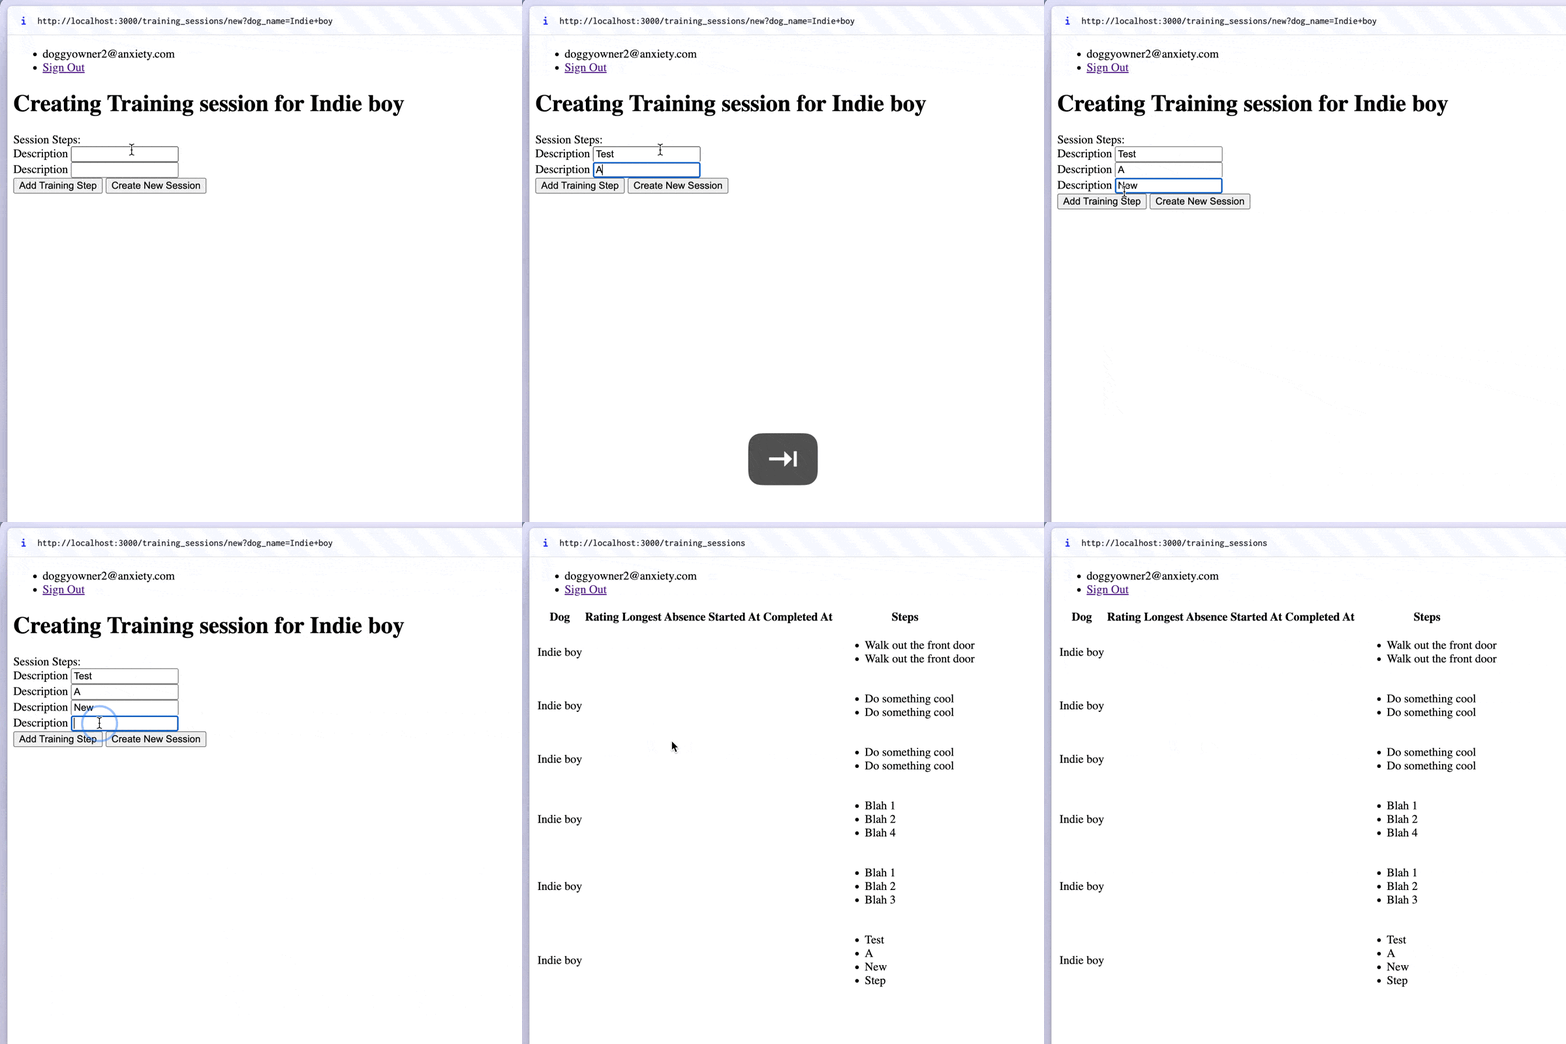
Now if we reload our app there’s now a button that lets you add more training steps 🎉.

Breaking down the changes
Let’s break down the changes.
<template data-nested-form-target="template">
...
</template>

<div data-nested-form-target="target"></div>
We register two targets with Stimulus, template and target. The template target, which in Stimulus, gets referred to as this.templateTarget is inserted into this.targetTarget via insertAdjacentHTML. The template is defined similar to our original definition of the training_step fields. But it has two additional params: TrainingSteps.new and child_index: 'NEW_RECORD'
<%= form.fields_for :training_steps, TrainingStep.new, child_index: 'NEW_RECORD' do |training_steps_form| %>
  ...
<% end %>
Rails requires the index of nested fields to be unique. It enforces uniqueness via a child_index. See the Rails docs. We must keep the NEW_RECORD value. Stimulus nested form component will replace the term NEW_RECORD with Date.getTime().toString().
TrainingStep.new is used to build a new instance of the Training Step model. Without this model, we’ll see some odd behaviour where we add two fields every time we press the “Add Training Step” button. Note: the two comes from our controller: 2.times { @training_session.training_steps.build }.
Fun fact: even though two form elements get added, only one element get saved. Can you guess why? That’s right! It’s because the child index for those elements are the same. Rails will only save the last of the two values.
For reference, here’s the component source code.
At the time of writing:
- Rails 7.1
- Ruby 3.3.2
- Stimulus Nested Form Component 5.0.0
- Stimulus 3.2.2